3.24.2015

HOME{MADE} CHOCOLATE PUDDING

0 comments


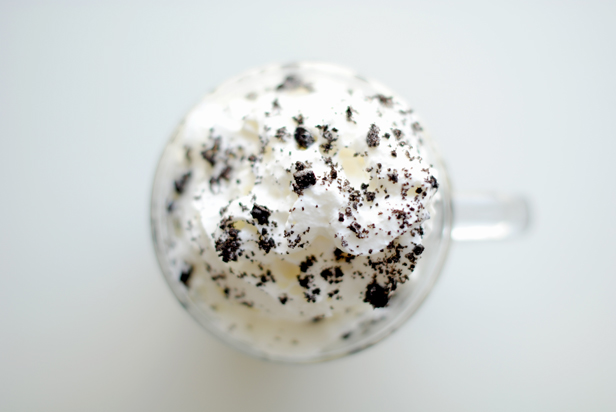
Happy 30th Birthday to Thane! This year we celebrated with a couple of dinner outings and then an evening at home on the night of his actual birthday. Instead of a cake, I surprised him with- you guessed- pudding! {Which may or may not have been spurred on by our conversation about how much we loved eating dirt & worms- the Oreo & gummy worm dessert- when we were little. Who remembers that yummy concoction?!}. This happens to be a family recipe, and let me just say two words; more, please! With the exception of homemade granola, we've been on a fairly consistent no dessert eating streak at home. But I'm already scheming to make more of this pudding... It's so much better than what you get at the store!

INGREDIENTS
2 ounces semi-sweet chocolate baking squares {add more or less according to taste}
Half cup of brown sugar
4 cups of milk, I used whole.
4 T cornstarch
1 Egg
Whipped cream for the topping {optional}
Oreo crumbs or crumbled up Oreo cookies for the bottom of the bowl and/or topping {optional}
1 t vanilla extract

DIRECTIONS
Melt the chocolate in a small bowl.
Heat three cups of milk in a double boiler, while adding the cornstarch and the brown sugar to the remaining cup of milk and stirring constantly to avoid hardening.
Once the milk is heated in the double boiler, add the remaining cup with the cornstarch, mix thoroughly and heat.
Remove about a cup of the milk mixture from the double boiler and add a raw, whisked egg.
Pour the milk and egg mixture back into the double boiler and add the chocolate and vanilla extract.
Stir until thick.
Pour into ungreased serving bowls/cups, {with the oreo crumbs already added to the bottom} and cool in the refrigerator.
Enjoy!

P.S. If you want to make a healthier version of this, cut out half or even all of the brown sugar. I accidentally didn't add the sugar this past time and we still loved it. Or use 2% or skim milk instead of whole.

What are you guys indulging in lately? Leave a link to your favorite dessert recipe below!


2.05.2015

HOMEMADE GRANOLA

2 comments


Oh, granola. If there was ever a health food that could be labeled a vice, this is it. If you've known us for any length of time, you know we are were avid cookie eaters and lovers of all things sweet. But we've been working on cutting back on refined sugar for a while now and we've taken some real strides in improving our overall diet. We feel better mentally and physically, and most important of all, it's one small step towards treating our bodies as the temples that Christ has so graciously made them to be {1 Corinthians 6:19-20}. So granola is our new "dessert", and boy is it good. I started eating a lot of it about a year ago, and I used to go through tons of the Bear Naked brand until my deployment-roomie from last year decided to start making a homemade version- go Sam! Obviously there's still sugar in this and it's still a high calorie food, so you have to have it in moderation. But I can tell a huge difference between eating this as opposed to a regular dessert with lots of empty carbs and refined sugar. This doesn't lead to an energy crash the same way the other stuff does, and it's packed with protein and healthy fats and nutrients. I do my best to make it through the whole day with extremely little refined sugar, and then this- with a handful of dark chocolate chips- is my evening treat.

I'm sure a lot of you already have your own granola recipes, but if not, give this one a try! Once you get the hang of it, it's the easiest thing to make and it's so much less expensive and fresher tasting than what you buy at the store. Not to mention a great, nutrient-rich snack for kids.

INGREDIENTS 
The Granola
6 cups raw Old Fashioned oats
2/3 cup honey
1/2 cup Canola oil 

The Extras {adjust according to taste!}
1/4 cup each of unsalted nuts like almonds, walnuts, & pecans
1/4 cup toasted sesame seeds
Non-stick cooking spray
Raisans, craisans, and/or dark chocolate chips

DIRECTIONS
Preheat your oven to 350 degrees.
Spray a baking dish with non-stick cooking spray.
Pour your raw oats into your baking dish and heat them in the oven for about 15 minutes.
Remove from the oven and add the honey and canola oil to the oats, being sure to stir and coat it evenly.
Place back in the oven and set your timer for about 20 minutes. Halfway through, stir the oats to prevent the top layer from browning unevenly.
Once your oats are golden {about 20 minutes}, take them out, stir them again- don't forget that or they may harden and stick to the pan!- and then let them cool.
Add the nuts, sesame seeds, raisans/craisans and/or chocolate chips and stir.


Enjoy!


1.05.2015

HOMEMADE PIZZA BAGELS

0 comments


I really wanted to make pizza from scratch the other day but {as usual} found myself pressed for time. Then I remembered the Asagio Cheese bagels Thane had just picked up from Panera. They're delicious and they're half price on Tuesdays!

And that led to a really easy experiment in cooking that's one of my new favorites! I don't know about you guys, but I'm always looking for some good lunch alternatives to the standard grilled cheese or peanut butter & jelly sandwiches that I usually make for the boys. These pizza bagels are certainly nothing revolutionary, but with five simple ingredients and just a few minutes of time they make for quite a yummy treat. Plus it doubles as a fun morning activity because it's definitely something the kids can help out with!

INGREDIENTS
Bagels {Panera's Asagio Cheese are what make these so good}
Ragu's Traditional Pasta sauce
Mozzarella
Italian seasoning and/or Oregano  
Pepperonis
Garlic powder


DIRECTIONS 
Pre-heat your oven to 400 degrees, build your pizza's however you like them best, and bake them on a cookie sheet for about ten to twelve minutes. 


What about you? What are some of your lunch favorites?


12.11.2014

CHOCOLATE CHIP CAKE BATTER COOKIES

0 comments


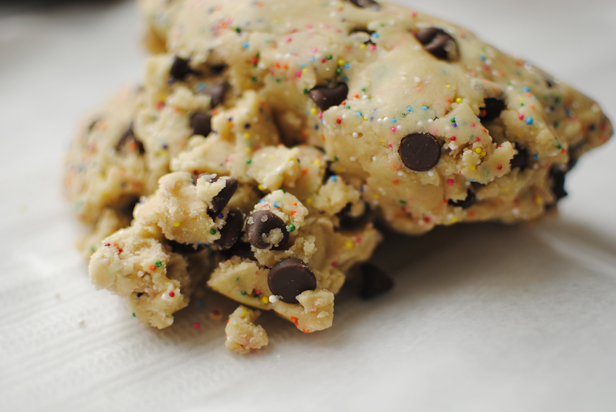
Oh my. You just never know what may happen when you find yourself standing in the middle of a room full of bored, crying kids and desperation strikes. Who's seen the scene from I Don't Know How She Does It where Sarah Jessica Parker bribes her kids with the classic "who wants to watch cartoons?!" line? In my house, it's "who wants to bake cookies?!" Anyway, that's what lead to trying this new recipe {from Sally's Baking Addiction}. I'm usually very unadventurous when it comes to cookie baking and I stick with the classic back-of-the-bag Tollhouse chocolate chip recipe. But this time we just so happened to have everything we needed to try something new.


I actually stuck to the directions to refrigerate the dough for at least two hours, and it was worth the wait. I was also kind of interested to see Sally's method for forming "tall" cookie balls {plus adding a few extra chocolate chips to the top of each ball}, something I've actually been doing for a while but had never seen anyone else mention! That's about my only semi-original baking tip.

Needless to say, the tears dried up real quick once the cookie factory was open for business...


I set the timer for exactly ten minutes and that was perfect. They look slightly underdone when they come out of the oven, but they're just right.


I think these are going to have to become a staple recipe, especially for birthdays!

INGREDIENTS
  • 1 and 1/4 cup all-purpose flour
  • 1 and 1/4 cup yellow or vanilla boxed cake mix (I used Betty Crocker's Butter Yellow)
  • 1/2 teaspoon baking soda
  • 3/4 cup (1.5 sticks) butter, softened to room temperature
  • 1/2 cup granulated sugar
  • 1/2 cup light brown sugar
  • 1 egg, at room temperature
  • 1 and 1/2 teaspoons vanilla extract
  • 1 cup chocolate chips
  • 1/2 cup sprinkles

DIRECTIONS
In a large bowl, mix the flour, cake mix, and baking soda. Set aside.

Cream the softened butter and both sugars together until smooth. Add the egg and vanilla and mix until combined. Add the flour, chocolate chips, and sprinkles and mix. Use your hands to knead it if the dough is powdery.

Cover with plastic wrap and refrigerate for at least 2 hours or up to 3-4 days. Don't skip this or the
cookies may bake too flat. You may also freeze the balls at this point for up to 3 months. {Then bake as directed adding 1 minute to the bake time without thawing.}

Once dough has been chilled, preheat the oven to 350F degrees.

Scoop rounded balls of the cold dough onto an ungreased baking sheet. Shape your cookie dough balls to be "taller" than they are wide, as pictured above.

Bake the cookies for 10-12 minutes until edges are slightly browned. Mine took 10 minutes exactly. The centers will still appear very soft, but the cookies will set as they cool.

Enjoy!


11.11.2014

HOMEMADE FLAX SEED BREAD

0 comments


FLAX SEED BREAD

Ingredients
1 Cup olive oil
1 Cup maple syrup or honey
5 Cups warm water
1 Cup cornmeal
2 Teaspoons salt
4 Tablespoons flax seed
2 Tablespoons yeast
10-14 Cups of flour {white, whole wheat, or a combination}

Directions
-Mix all the ingredients in a large mixing bowl and use enough flour to make it thick and non-sticky.
-Let the dough rise for 45 minutes, until doubled in size.
-Knead and put into greased bread pans.
-Let it rise for another 45 minutes.
-Preheat the oven to 350 degrees and bake for 30-40 minutes, or until bread is golden and makes a hollow sound when tapped. {I like to under cook ours slightly to get a soft, moist, chewy texture}.
-Turn out immediately and cool on a cooling rack.

This flax seed bread is simple, yummy, and a new staple in our house. But best of all, our first taste of it began with a dear friend's act of kindness. A couple of hours after arriving home from a long car trip with the boys, my neighbor Becky pulled into my driveway with a half gallon of milk and a loaf of this flax seed bread. We'd been out of town for over a month and Thane was deployed, so fresh food and the familiar face of a good friend was a welcomed sight. What a blessing she was! And not just on that day. She's opened her home to us countless times, watched our boys more times than I can remember, and is always a fresh source of encouragement. Also, she's a fellow Army wife who recently went through a deployment of her own. That means she's well acquainted with the joys and challenges of it all, and there is such sweet fellowship in that. This bread will always be a warm reminder of her friendship, and I'm so grateful to God for putting her in my path!

One last thing, if you're looking for a healthy snack idea for the whole family {with no refined sugar!}, see my banana bran muffin recipe here. Happy baking!


3.03.2014

HEALTHY BANANA BRAN MUFFINS


Lately I've been on a quest to come up with healthy, family-friendly snacks. I find myself craving sweet carbs- as in, muffins- between lunch and dinner. But after giving up refined sugar almost entirely a few months back, I couldn't revert to eating the standard sugary muffin that I would normally would. So, I've tried a few different recipes and I think I've found the keeper. It's modified from this recipe, in which I replaced the brown sugar, butter, and white flour with honey, greek yogurt, and whole wheat flour.

Ingredients:
-1/2 heaping cup of plain greek yogurt
-1/2 cup natural honey
-3 mashed bananas
-1/4 cup milk
-1 teaspoon vanilla extract 
-2 eggs
-1 and 1/2 cups whole wheat flour
-1/2 cup wheat bran
-1 teaspoon baking powder
-1 teaspoon baking soda
-1/4 teaspoon salt
-1 teaspoon cinnamon
-1/4 teaspoon ground cloves
-1/2 cup walnuts

Directions:
1) Preheat oven to 375 degrees F (190 degrees C). Grease a muffin pan or line with paper muffin liners.
2) In a large mixing bowl, cream yogurt and honey together. Add bananas, milk, vanilla and eggs; mix well. Stir in flour, bran, baking powder, soda, salt, and spices; blend just until moistened. Stir in walnuts. Pour batter into prepared muffin cups.
3) Bake at 375 degrees F (190 degrees C) for 20 to 25 minutes or until a toothpick inserted into the center of a muffin comes out clean. Cool in the cups for 5 minutes, then remove muffins and place on a wire rack to cool completely. 

Enjoy! 


9.29.2013

CHOCOLATE CHIP PUMPKIN MUFFINS

0 comments


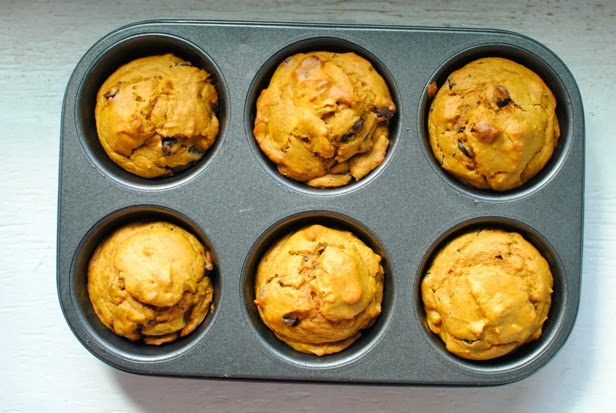
Who's excited that it's almost October?! Full fledged fall is here {and other than the fact that it means it's time for Thane to deploy} I'm thrilled! So to ring in the season correctly, we had to have some chocolate chip pumpkin muffins. They turned out delicious, here's the recipe in case you want to give it a try:

3/4 Cup white sugar
1/4 Cup vegetable oil
2 eggs
3/4 canned pumpkin
1/4 Cup water
1.5 Cups all purpose flour
3/4 Teaspoon baking powder
1/2 Teaspoon baking soda
1 Teaspoon ground cinnamon
1 Teaspoon nutmeg {adjust to your taste}
1/4 Teaspoon salt
1/2 Cup semi-sweet chocolate chips
1/2 Cup walnuts

Mix it all up and bake at 400 degrees for about 20 minutes! And for perfection, have it with a cup of coffee!

Happy fall & happy baking!


7.08.2013

EASY STRAWBERRY SHORTCAKE


Asher and I made our first cake together! In spite of the quarter he added to the mix, the egg shell he attempted to add {from the egg that he cracked and dropped onto the floor}, and the sample he reached up and took out of the finished, cooling cake, he was a wonderful helper. I think chocolate chip cookies will be next on our mommy-toddler baking list!

Strawberry Shortcake with Homemade Whipped Cream
Ingredients:
-Yellow cake mix
-eggs
-vegetable oil
-one cup heavy whipping cream
-2 tablespoons confectionery sugar
-1 tsp. vanilla extract
-fresh strawberries

Directions:
Cook the yellow cake according to box instructions. Make the whipped cream by combining the heavy whipping cream, confectionery sugar, and vanilla extract, and beating with electric beaters until peaks form (a couple of minutes). After "frosting" the cake with the whipped cream, add freshly cut strawberries. Refrigerate or serve immediately, and enjoy!


Copyright © Sarah Keller | Theme by BloggerThemes & simplywp | Sponsored by BB Blogging